Pages

Showing posts with label dessert. Show all posts

Friday, August 26, 2022

Double chocolate cookie !


My sister requested for a video to compete my daughter in a kids cooking competition; realizing it's been awhile since her last video, I comply. I was researching for easy recipe for her to make, but at the same time I need to consider in only using what that is already in the kitchen, as I definitely not in the mood to shop for more items. While browsing through the pantry, I notice a small tub of cocoa powder and a pack of chocolate chips. Double chocolate cookie! 

As I was measuring the ingredients, I realize that I have not told my daughter that she is the one that will need to make the cookie, not me. Knowing that she gets excited and hurriedly go and washes her hands (she now accustoms with the rule of clean hands when cooking) and bugs me when I will be done in preparing the ingredients and set up the camera. Eventually I shooed her and her sister to watch some cartoon while I complete the set up. 

The recipe that I choose was one of the top three recipe that pops out when I type double chocolate cookie. But this recipe was chosen as it does not demand for brown sugar, which I don't have at the moment.  

The recipe demands for 1 1/2 cup of sugar, but reading the comments below the recipe stating the amount of sugar resulted to a "too sweet" of a cookie, I decided to cut the sugar to only 1 cup. The recipe also instructed for 10 minutes baking time, but somehow the cookie feels too soft at 10 minutes, that I add another 10 minutes, but maybe I only need to add 5 minutes. Still, the cookies tasted great. I think it will be nice to pair thee cookies with either milk or tea. 

 So here I present you double chocolate cookie...


Ingredients:

1 cup of sugar

1 cup of butter

2 eggs

2 teaspoon vanilla extract

2 cup of flour

2/3 cup of cocoa powder

3/4 teaspoon of baking soda

1/4 teaspoon of salt

2 cup of  semi sweet chocolate chips

1/2 cup of  chopped walnuts (optional)


Methods:

- Preheat the oven to 175 C

- Mix the dry ingredients: Flour, cocoa powder, baking soda and salt

- Beat the butter and sugar

-Add the eggs and vanilla extract and continue beating

- Fold in the dry ingredients a little bit at a time. 

- Mix in the chocolate chips and the nuts

- Scoop the cookie dough onto a baking tray with distance about 2-3 inches in between a dollop of dough

- Bake for about 10-15 minutes.

-Let the cookie cools a bit before enjoying..

Thursday, February 18, 2021

No bake peach cheesecake


Since my daughter starting to star my videos, she has been hankering me for us to make a cheesecake. I kept on delaying as cream cheese is not an easy find, and even if you found it, the price can hurt your wallet. But as her grandfather's birthday nearing, I comply.

Ingredient:

Crust:

7-10 piece of digestive or marie biscuit

2 tablespoons of sugar

70g butter


Cake:

500g cream cheese

¾ cup of fine sugar

1 small box of cream (about 200 ml)

5 peach halves (pulverised)

1 teaspoon of vanilla

Orange food coloring (optional)

1 small pack of agar-agar (8-10g)

1 cup of water


Decoration:

Jelly or konyaku (prepare as instructed on packaging)

Peaches halves (cut to preference)


Methods:

Prepare the crust:

Crush the biscuit to preference. I prefer the biscuit some big pieces, some prefer it finer.

Add the melted butter and sugar.

Mix thoroughly

Pour into prepared springfoam pan that have been layered with cling film

Packed the biscuit using the base of a clean cup (or anything else that flat bottomed)

Put in fridge to solidify.


Prepare the agar-agar:

Pour the agar-agar powder in a saucepan.

Add in water and let it bloom for about 5 minutes

Melt on a small flame just before adding to the cheese base


Cake:

In a mixing bowl, put in the cream cheese and sugar. Beat until somewhat fluffy

Add in cream, crushed peach, and vanilla. Continue beating until fully incorporated

Add the hot agar-agar slowly while beating.

Pour the cheese base into the prepared cake pan

Put into the fridge to cool for at least 4 hours


Decorating:

Cut the peach halves to your liking and arrange it on the cake as your preference.

Pour prepared jelly or konyaku to solidify the arrangements.

Chill to set.


Tuesday, February 2, 2021

Chocolate cake - minus the egg


Since the start of the 1st MCO,  I've been staying at my mother's house which accidentally act as her bakery. Seeing her grandmother bakes everyday makes my daughter also wants to join in the fun. As luck have it, we are stuck at Kota Puteri at the present MCO. With not much she can do, she is begging me to allow her to bake (of course I did all the baking, she only do the pouring the ingredients into the mixing bowl). And around the same time my sister has been requesting me to edit a video of my daughter making fruit tarts for her work, that inspired me to record and edit my own video.  Being far from any known bakery, I was a little heavy hearted to let her use all of my butter stock for her baking, so I searched for recipe that uses oil rather than butter. This is the recipe I've decide to use and I do not regret one bit..

Ingredients:

2 cups sugar

3 cups all purpose flour

2 teaspoon baking soda

1/2 teaspoon salt

1/2 cup cocoa powder

2 cups water

1 teaspoon vanilla essence

1 cup vegetable oil

2 tablespoon vinegar. 


Methods:

Preheat your oven to 175 C and prepare your baking pan.

Mix all your dry items in a  bowl

Mix your wet ingredients in another bowl

Mix both of the wet and the dry ingredient until fully incorporated. 

Bake for about 40 minutes or until the toothpick inserted at the center comes out clean. 

Friday, October 30, 2020

Creamy tuna pie


Upon eating my chicken mushroom pie, my tuna avid father requested for tuna pie...

So I started to again search for some recipe for tuna pie. I was also actually somewhat ready to make new pastry crust (I used my previous crust for the chicken pie). I finally decided to use this recipe as my referral to make my pie. 


Ingredients:

2 tbs butter

2 tbs cooking oil

3 cloves of garlic, chopped

1 small onion, chopped

2 tbs all purpose flour

3 cups of milk

1/2 cup corn, drained

4 piece cheese

2 can tuna or 1 can tuna & 1 can sardine, drain, rinse and flaked.

salt pepper to taste

puff pastries, thawed


Methods:

Preheat the oven to 175C.

Melt the butter with the oil in a pan. Saute the onion and garlic until fragrance. 

Add flour and stir until cooked. About 2 minutes.

Turn off heat and whisk the milk little by little until creamy. 

Add the tuna, corn and cheese. Mix carefully.

Spread the tuna pastry to a suitable size. you can make a big pie if you want, but for me, a hand-held pie is more manageable. 

Give the pie an egg wash, you may sprinkle some black sesame or some oregano flakes if you want and bake the pie for about 10 minutes or until golden. 

Saturday, October 3, 2020

Peanut butter cake


Upon a request, I googled for recipes of nuts cake. I read about walnut cake and multinut cake and fruit cakes too. Suddenly I was inspired to search about peanut cake, and lo behold google gave me recipes for peanut butter cake. I picked one that seems easy enough and picked an occasion to test the recipe out. The recipe request upon peanut butter frosting, but as  I buy just enough peanut butter for the cake, I need to improvise for the frosting. Using the peanut butter - grape jelly combo and chocolate for frosting, I serve the cake square to my family first. My children loves the cake with the chocolate frosting better, but I've found the peanut butter - jelly frosting suits my taste better. 

Here are the recipe:

Ingredients:

CAKE
2 cup Flour
2 cup Sugar
1 tsp Baking Soda
1/2 cup Milk
2 Eggs
1 tsp Vanilla
1 cup Water
1/2 cup Butter
3/4 cup Peanut Butter

FROSTING
1/2 cup softened Butter
1 cup Peanut Butter (or chocolate spread or peanut butter-jelly combo)
3 tbsp Milk
2 cup Powdered Sugar


Methods:

Cake

Preheat oven to 175 C.
Grease a 9×13 baking dish with butter. Dust with flour to prevent sticking.
Whisk together flour, sugar, and baking soda in a large bowl.
Add milk, eggs, and vanilla to bowl.
Beat mixture at low speed until blended.
Add water, butter, and peanut butter to a saucepan.
Heat over medium heat stirring frequently until blended (about 5 minutes).
Add peanut butter mixture into flour mixture.
Stir until batter is well mixed and pour into prepared dish.
Bake about 30 minutes or until a toothpick inserted in the center of the cake comes out clean.
Allow to cool.

Frosting 

Cream together the butter and peanut butter (or chocolate spread for my case).
Slowly add in the sugar, if it gets too thick then add a little milk to thin.
Continue until all of the sugar is in and the frosting is blended to the right consistency.
Spread frosting over cooled cake.


Friday, June 19, 2020

Double chocolate buns

Double chocolate buns


Being a daughter of a baker, I always have a somewhat hankering for baking. It could be for baking cakes, pasta or even bread. My hankering with Asian cuisine was not so strong as cooking Asian cuisine was done daily, though sometimes I do up my game with some Chinese, Japanese, Thailand and Korean cooking and if I could be so un-modest, I would say that they comes out bearable most of the times, if not good.
Back to the recipe 😅 , (about) a week ago, my daughter requested for a cupcakes full with its embellishments and sprinkles, and to be true to time, the oven's plug has busted the weekend before that. Then was when I realize we do have a bread-maker in the house. It seems my daughter's cupcake doesn't have anything to do with the story too. Hahaha. Okay, by realizing there's a bread-maker in the house, I started to look for recipe to bake bread, I can't use my mother's bread recipe as her's uses bread flour which I don't have. I found a recipe that claim they have a recipe for a soft bread. I have tried to trace the recipe again, but all that I have is a screenshot of the ingredients and the webpage: techocolateandmore.com which I also fail to open when typed. It is actually an either soft bread loaf recipe or soft buns recipe, which of course I edited. Well I need to edit the recipe to feed my picky firstborn...

Ingredients:

4 cups all purpose flour
1 teaspoon salt
1/4 - 1/3 cup cocoa powder
1/4 cup of milk powder
1 1/2 cup hot/warm water
1/3 cup sugar
1 pack active dry yeast
1 egg
1/3 cup vegetable shortening
1/3 - 1/2 cup chocolate chip

Methods:

1) Stir the sugar in the water and pour in the yeast. Leave for about 5 minutes until foamy while you prepare the other ingredient.
2) Put the flour, salt and cocoa powder in a bowl, whisk until mixed and make a well in the middle.
3) Pour in the egg that have been beaten and the yeast mixture. Mix in the shortening too.
4) Knead, if possible without adding any flour. Knead until at least until the dough prefer to stick to each other rather than the wall of the bowl, better yet, you could do the window pane test (which I have yet to master). I wouldn't lie, a proper baker would properly told you to knead on a flat surface, but as I am lacking a proper flat surface and I want to reduce surfaces I need to clean afterwards, I rather knead in the bowl it self, or better, a flat-bottomed pot. If the pot have a lid of it's own is even better. I just put the lid onto the pot to leave it to rise.
5) Leave to rise until double in size; for about 1 hour.
6) Knead for a minute while incorporating the chocolate chip into the dough.
7) Divide to small equal balls (18 balls?) and arrange in a baking pan. Let rise for about 1 hour.
8) Heat the oven halfway to the bread rise to about 180C
9) Bake the bread for about 25-30 minutes. Lower the heat to 175C when you put the bread into the oven.


Saturday, May 23, 2020

No bake cheesecake using agar


A few weeks ago I try to make a mango no bake cheesecake using gelatin ( as instructed by the recipe), and dear me, it turned out to be a flop. The gelatin doesn't hold the cake, it blubbered out from the pan.  I tried to eat most of it, but cheesecake is not something you can enjoy too much of- the cream, the cheese. You'll go tired of it in no time. Not to mention as I was preparing the gelatin for the cake, the smell of it when exiting the microwave oven was  such a kill-off.
Being me, I wish to achieve some sort of a- yes! moment, so yesterday I tried the recipe using agar (a jellylike substance, obtained from red algae- wikipedia). As at the time I don't know there people who has already use this, I trialed adjusting the recipe I got from here and here.
While writing this I found out that there are actually those who have managed to achieve making cheesecake using agar. You can look the recipe here. Well, back to my adventure...


Ingredients:

Crust:
A- 1/2 pack of digestive biscuit
B- 1/4 cup of cornflake
C- 1 tablespoon of brown sugar
D- 65g of butter

Cheesecake filling:
A- 1/3 pack of agar (+-9g)
B- 1/4 cup of water
C- 250g cream cheese (room temperature)
D- 3/4 cup powdered sugar (shifted)
E- 1 teaspoon vanilla extract
F- 1 tablespoon fresh lemon juice (optional)
G- Zest of half a lemon (optional)
H- 1 cup of cream

I- A jar of blackberry/strawberry/raspberry jelly or jam (optional)

Methods:
1- Crush the biscuit and cornflake.
2- Melt the butter.
3- Mix thoroughly the crushed biscuit/cornflake, butter and sugar.
4- Press the mixture in a springform pan about 7x7 inch and put in the fridge for at least an hour to firm.
 5- Soak the agar into a bowl of water for about 10 minutes.
6-  Beat the cream cheese and sugar until fluffy.
7- Add the flavouring: Vanilla and lemon, and continue beating
8- Strain the water out of the agar. Put the agar into the 1/4 cup of water and heat in low with a microwave oven. Stir for every 5 minutes until all is smooth and melted.
9- Add the cream into the cheese filling and continue beating. Don't forget to scrape the sides of the bowl.
10- Slowly drizzle the agar into the cheese filling while the beating the fillings.
11- Quickly pour the filling into the springform pan and smooth it.
12- Melt the jelly in the microwave over low and sieve if there is seeds in them.
13- Pour on top the cheesecake and let everything set in the fridge for at least 4 hours.

These are the ingredients I think should be use instead; (I think I've used a little bit more agar than I should- I used maybe 12g, but when eating it, the texture seems spot on)

Here is the picture of my failed no bake mango cheesecake:


How it tells you should never judge from looks..

Sunday, May 17, 2020

chicken dim sum


When I made chicken murtabak using popia sheet (I got this idea from Facebook), I notice that wet popia sheet has the almost the texture of dim sum's wrapper after steaming. It inspire me to search for recipe for dim sum from several web page. Eventually this is the recipe that I settle with

Ingredients:
A- 800g of mince chicken
B- 1/4 cup of corn flour
C- 1/3 carrot (small dice)
D- 1/8 cabbage (small dice)
E- 1/3 onion (small dice)
F- 2 stalk of scallion (cut small)
G- 2 eggs
H- salt and sugar to taste
I- popia sheet


Methods:
1- cut the popia sheet so you will have equal 4 small squares wrapper sheet for every 1wrapper sheet
2- put all the other ingredient in a bowl and mix well.
3- use 2 layer of the wrapper (1 layer is a bit too thin) and put a small dollop of the mixture in the middle of the wrapper
4- use flour water to act as glue. you can use which ever method to shape the dim sum.
5- steam the dim sum until the wrapper seems translucent.
6- enjoy warm..

Tuesday, April 21, 2020

Meringue cookies


Once upon a time my sister used a lot of egg yolk that resulted to egg whites to spare, I don't really understand it but I noticed that my sister have always requested for me to make something if she have egg whites to spare. So the other day she requested for me to make something again; my mother requested meringue cookie, which I found a bit weird, but I agree nonetheless. My mother even pick the recipe she wants me to use.  So, here it is:

Ingredients:
a) 1 cup of egg whites
b) 2 1/4 cup of icing sugar or granulated sugar (grind)
c) 1 teaspoon of vanilla essense (optional)

Methods:
1) Pre heat the oven to 80C
2) Prepare the mixing bowl, ensure there's no water, oil nor egg yolk.
3) Using the waterbath method on a medium heat fire, whisk slowly the egg whites and sugar until the sugar dissolve. Rub some of the meringue in between your finger to ensure there's none of the sugar that hasn't dissolve.
4) Take if off the fire, whisk on low speed for about 30 second before increasing the speed to medium and beat until still and thick. You may add you coloring now if you want to.
5) Pipe the meringue onto a lined baking tray.
6) Bake for at least 2 hours until the cookie is crisp outside and the bottom isn't sticking onto the tray  anymore.

This video inspired this look; even if someone increases the temperature of the oven and cracked my meringue.


I use chocolate sprinkles for the eyes..


Friday, April 17, 2020

Better Lemon Cake ~


Lemon Cake

Honestly I've made lemon cake before, but that cake has still to receive my mother's approval. And this recipe definitely got my mother's approval. I got this recipe from here. I did change the recipe a bit...and i didn't regret it one bit. Here I'm adding a link to the video on how to make this. 

Ingredient:

cake:
a) 2 cups all-purpose flour
b) 1 teaspoon baking powder
c) 1/2 teaspoon baking soda
d) 1/4 teaspoon salt
e) 1 tablespoon zest (around 2 lemons' worth)
f)  1/2 cup unsalted butter (room temperature)
g) 1 1/8 cup granulated sugar
h)  1/2 cup lemon juice (around 4-5 lemons' worth)
i)  1/2 cup milk
j) 3 large eggs

glaze:
1/2 cup icing sugar
1/4 cup lemon juice


method:
1) preheat the oven to 175C
2) Prepare your baking pan
3) mix the dry ingredients: flour, baking powder, baking soda, salt and lemon zest.
4) beat the butter using the medium speed for 2-3 minutes
5) add the sugar gradually and continue beating for another 2-3 minutes. Give the batter occasional scraping.
6) add eggs, one at a time
7) add lemon juice
8) add the dry ingredient and the milk alternately
9) bake the cake for about 45-60 minutes or until the toothpick comes out clean when poked.
10) let cake cool for 10 minutes before cooling on a rack.
11) poke the cake with a toothpick and brush the glaze over the cake
12) enjoy


Cream cheese lemon frosting

Ingredient: 
8 ounce cream cheese (softened)
1/2 cup butter (softened)
1/4 cup lemon juice
1 heaping tablespoon lemon zest
4 1/2 cup powdered sugar.

Method:
1- beat the butter, cream cheese, lemon juice, and the lemon zest in a mixer until blended
2- mix the sugar, a cup at a time.


Thursday, November 21, 2019

Peanut butter chocolate cheesecake


Peanut butter chocolate cheesecake. 

I'm not sure what is it that inspire me in trying this recipe. I vaguely remember peanut butter and  chocolate works together, so why don't we try a peanut butter tart. But I'm not sure what brings the idea of adding cheese together. So, on the day of trying this recipe, I googled and there are a lot of variation to this recipe; I was not the first one who had inspiration... So I alter my chocolate cheesecake recipe to accommodate this recipe:

Ingredients:

  • 150g (5 oz) Marie biscuits
  • 45g (1 1/2 oz) butter (melted)
  • A tbsp of caster sugar.
  • A tbsp of cocoa powder
  • 3/4 cup powdered sugar
  • 120ml cream
  • a splash of vanilla essence
  • 400g cream cheese (room temperature)
  • 2 large eggs
  • A cup of peanut butter

Methods:

1) Beat the biscuits in a plastic bag until they become crumbs. you may leaves some crumbs a bit bigger if you like to

2) Pre-heat the oven to 180C

3) Add the butter and a tablespoon-full of sugar to the biscuit crumbs. You may add some cocoa powder to the mixture to give some colour and taste; I did.

4) Prepare a spring form cake tin; line the tin with baking paper, use butter to help it stick to the tin

5) Pour the biscuit mix into the cake tin. Compress and level the mix using the bottom of a clean glass. put in the refrigerator to set.


6) Beat the cream cheese with peanut butter and sugar until fluffy

8) Add the vanilla essence

9) Add to the cream to the cheese mixture. 

10) Add the eggs one by one.

11) Pour into the cake tin, reduce the oven's temperature to 175C. Bake the cake using a water bath method (google it if this is the first time you are confronted with the term)

12) Bake for 45 minutes; or until the toothpick comes out clean after poked into 1 inch from the edge. Turn off the temperature, open the oven door for a bit, and let the cake cooled for about an hour in the oven (sudden drop in temperature could result in a cracked cake). Finish cooling the cake on a rack, before chilling in the fridge. 

What I did was make a ganache (which was a bit thin to my liking) and cover the cake. But after tasting the cake, I find the cake was too rich for my taste. It made me think if it is better if I use grape jam and let the slight tartness of the jam gives an elevation to the cake. But that is on another try of the cake...


Sunday, November 10, 2019

Fluffy doughnuts... mmm Fuwa-fuwa..


Soft fluffy doughnuts....

Fuwa-fuwa is an expression I've encountered from the series Chi's adventure which means fluffy. I've eaten a lot of doughnut, and going through handmade doughnut and their commercial counterparts, I have found not much that can beat the softness of this doughnut.
Make it stuffed, holed, halved, sugar-coated, glazed... you can never go wrong. Actually I've made a few type of the doughnut; icing sugar- coated holed doughnut, almond sliced covered doughnut and cinnamon cream cheese - filled doughnut, but before I could take picture any of them, the have fly away without leaving a trace. The filled ones have been spared as they was the latest to be done.
I got the recipe from this page. The page list several ways to make them, but I'm only going to list one.

Ingredient:

1)  6 tbsp warm water
2)  150 ml milk (at room temperature)
3)  1 egg, beaten (at room temperature)
4)  2 oz (57 g) butter, melted
5)  16 oz (454 g) all-purpose or bread flour (please us a scale)
6)  2 oz (57 g) sugar
7)  1 tsp salt
8)  1  1/2 tsp regular or quick-rise yeast (one and a 1/2 teaspoons)
9)  oil for frying  
10) (sugar or cinnamon sugar for coating the doughnuts)
11) (filling; jam, Nutella, cream cheese and or whipped cream for filling, if desired)

Equipment:

1) Scale
2) Parchment paper cut into the size of your doughnut. 
3) Deep pot or wok to fry the doughnut. 
4) Candy thermometer (optional).

Method:

1) Prepare and weigh all the ingredients.
2) Prepare the yeast; in a cup, put on 6 tbsp water, sprinkle the yeast. You could help using a pinch of sugar.
3) Mix in a bowl the dry ingredient; flour, sugar and salt.
4) If you are kneading by your hand, make a well and put in the wet ingredients; milk, egg, butter and yeast. If you are using a stand mixture, put in first the dry ingredients, let the machine run for a few second before add in the wet ingredients. Stop the machine once all the flour has forms into dough and sticks together.
5) Knead for about 10- 15 minutes.
6) Rest the dough into a greased bowl until double in size, for about an hour, or longer if your room's temperature is a bit chilly.
7) Prepare the oven for second proving; Put the oven into low. Set the timer for ONE minute.
8) Once the dough has double it size, give it a light kneading and cut in halve. Put one halve into a covered bowl so skin would not develop.
9) On a floured surface, roll the dough into a spread about 1/2 inch thick. Cut with a sharp doughnut cutter or a cookie cutter for filled doughnut. Put the prepared dough onto parchment paper that has been cut to size; this is for easy transfer and reduce deflating after the second proving. Put onto a tray. Do this until all the dough
10) Turn off the oven (if you haven't turn it off by this time), put in a dish with hot water into the oven. The steam will help in preventing a skin on top of the doughnuts while they are ongoing second proving.
11) Leave them for about half an hour.
12) Fry the doughnut until golden brown. Let cool.
13) If your doughnut need to be filled in, make a hole using a small paring knife or a skewer, warm your filling a bit so you will have an easier piping.
14) Now you can coat your doughnuts with sugar, or glaze them.
15) Enjoy!
🍩🍩🍩🍩🍩🍩🍩🍩🍩🍩🍩🍩🍩🍩🍩🍩🍩🍩


Friday, November 8, 2019

Peanut butter cookie


Peanut butter cookies..
I was looking for a cookie recipe as i want to reduce my buying and be able to control what goes in my children's tummy, and it is a fun recipe to bake with children.. hehe

Ingredient
A - 1.5 cups all purpose flour
B - 1 tsp baking soda
C - 1/2 tsp baking powder
D - 3/4 tsp salt
E - 1/2 cup unsalted butter (soften)
F - 1/2 cup granulated sugar
G - 1/2 cup brown sugar
H - 1 large egg
I  - 1 tsp vanilla essence
J  - 1 cup peanut butter

Method
1 - Pre-heat oven to about 170 C
2 - In a bowl, mix together flour, baking soda, baking powder and salt. Set aside.
3 - Beat and cream butter, granulated sugar and brown sugar
4 - Add egg and vanilla essence
5 - Add the peanut butter
6 - Add the dry ingredient gradually.
7 - Fold in chocolate chip or sprinkle if you want...
8 - Scoop small dollops onto tray with space to spread.
9 - Bake around 15 minutes, until the bottom and edge is slightly brown but the center is still slightly soft.


Saturday, June 22, 2019

A Brownies recipe- finally

A brownies recipe finally? Well the first time I've tasted brownies was when I was 10 years old. I was like- why haven't I tasted this before? To say that this is chocolate cake would be... out of it's league? but it's chocolate. Until someone there pointed out to me, no- it's not a cake, it's brownies. Yeah, that it it's name- brownies.
When I've gotten older, and I've gotten myself into baking, I tried a lot of recipe of brownies, maybe not a lot, but quite a number of it. I even tried to trace down my friend that brought that my-first-brownies-that-I-tried, who changed school once we finished primary school, who parents got separated and the only lead I had was then an acquaintance with the new mother. I am still trying to get the recipe from her- don't be fooled by my writing that I've obtained the recipe, but, this recipe at least was well received by me and my family. I got the recipe from here; I haven't tweaked it, yet- ok maybe I sprinkled some flaked almonds on top before baking, and I could try to make it less sweet- but that is for another time.

A picture? Sorry, maybe next time. The brownies was abolished....

 Ingredient:

1 1/4 cups (249 grams) granulated sugar
5 tablespoons (71 grams) unsalted butter
2 large eggs plus 1 egg yolk, cold
1 teaspoon vanilla extract
3/4 cup (75 grams) unsweetened cocoa powder
1/3 cup vegetable oil
1/2 cup (63 grams) all-purpose flour
1/8 teaspoon baking soda
1 tablespoon cornstarch
1/4 teaspoon salt
3/4 cup (128 grams) semisweet chocolate chips
Methods:

1- Preheat the oven to 180 C. Line a 8 by 8-inch pan with either butter and cocoa powder or butter and baking paper.
2-In a microwave safe bowl, add the butter and sugar. Microwave for about 1 minute, or until the butter is melted. (I've yet to try melting the butter in a saucepan, on the stove). Whisk in the eggs, egg yolk, and vanilla. Stir in the oil and cocoa powder.
3- With a rubber spatula, stir in the flour, baking soda, cornstarch, and salt until combined. Stir in the chocolate chips.
4- Spread the brownie batter evenly into the prepared pan. Here is where I sprinkle some almond flakes on top. Place in the oven and bake for 30 minutes, or until the brownies are set and a cake tested inserted into the center has moist crumbs attached. Do not overcook. Let cool completely before cutting and serving.

It was said that the brownies can be stored in an airtight container at room temperature for up to 3 days, but we have yet to go pass 2 days before it was cleaned out.

Tuesday, March 19, 2019

Sugar biscuits


On the occasion of making almost everything myself,  I decide to make my own sugar biscuits, especially when you can add to this recipe. I got the recipe from here. But this is my interpretation:


Ingredient:
375 g salted butter (or add a teaspoon of fine salt if you use unsalted butter)
90 g powdered sugar
1 teaspoon vanilla essence
400 g all purpose flour (you could add a teaspoon of baking soda if you wish)


Method:
  1. Preheat oven to 350F (180C). Line baking sheets with parchment paper.
  2. Place butter in a bowl and beat until creamy. Add powdered sugar and vanilla extract and continue mixing until the mixture becomes white and creamy.
  3. Using a spatula incorporate flour into the butter mixture until completely combined.
  4. Form small round dough of cookies on the prepared baking sheets. You may add chocolate chips, nut bits, M&M's, or basically anything here.
  5. Bake for 10-20 minutes or until the base begins to brown.
  6. Let the cookies cool completely on a cooling rack before serving.


Friday, October 26, 2018

chocolate cheesecake - baked


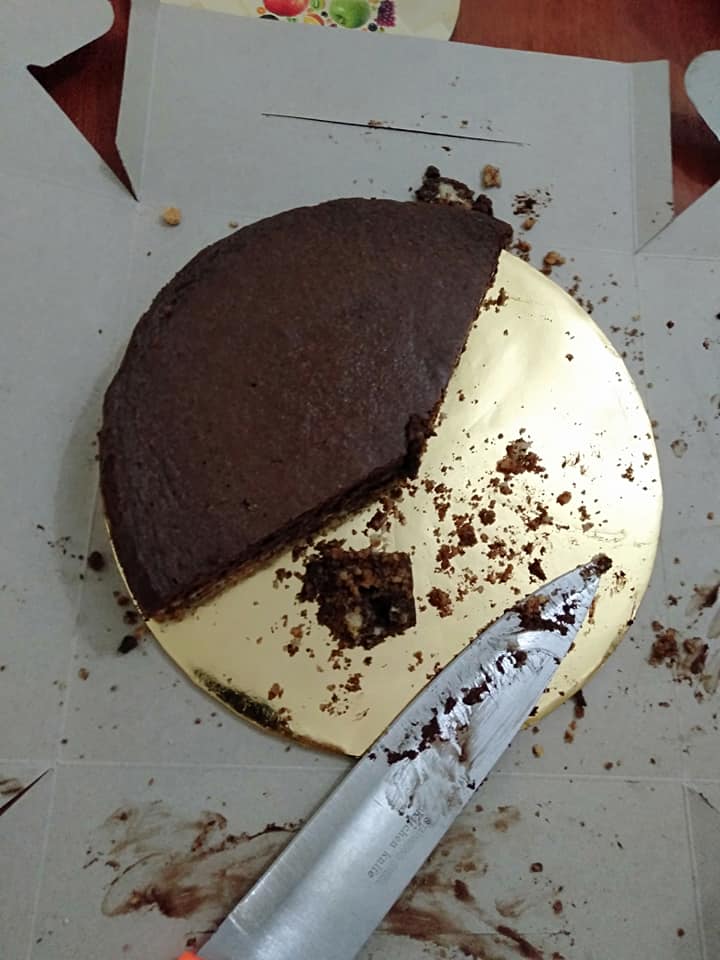
  The other day, one of my close friend finishes her studies, and return home after a long absence. As it is unusual for me to cook for my friends, I asked her what she would like me to make for her. Not known for her sweet tooth, I was surprised when she requested a cake, and a chocolate cheesecake to boot! I was determined not to be dampen, as it was my self who asked her to choose. So I googled recipes for no bake chocolate cheesecake, and the recipe from here is the easiest for me to follow.  You can follow this recipe, but due to some mistakes,I decided to add eggs to help firmed the cake, and thus, I have to bake it. 
     The following are the recipe for the cake that I made

Ingredient:


  • 150g (5 oz) Marie biscuits
  • 45g (1 1/2 oz) butter (melted)
  • 110g (4 oz) caster sugar, divided
  • 120ml cream
  • 150g (5 oz) dark chocolate, melted and cooled
  • 2 tablespoons cocoa powder mixed with a little hot water
  • a splash of vanilla essence
  • 200g cream cheese (room temperature)
  • 2 large eggs

Methods:

1) Beat the biscuits in a plastic bag until they become crumbs. you may leaves some crumbs a bit bigger if you like to

2) Pre-heat the oven to 180C

3) Add the butter and a tablespoon-full of sugar to the biscuit crumbs. You may add some cocoa powder to the mixture to give some colour and taste; I did.

4) Prepare a spring form cake tin; line the tin with baking paper, use butter to help it stick to the tin

5) Pour the biscuit mix into the cake tin. Compress and level the mix using the bottom of a clean glass. put in the refrigerator to set. 

6) Beat the cream cheese with sugar until fluffy

8) Add the chocolate and vanilla essence

9) Combine the cream and diluted cocoa powder, and add to the cream cheese mixture. 

10) Add the eggs one by one.

11) Pour into the cake tin, reduce the oven's temperature to 175C. Bake the cake using a water bath method (google it if this is the first time you are confronted with the term)

12) Bake for 45 minutes; or until the toothpick comes out clean after poked into 1 inch from the edge. Turn off the temperature, open the oven door for a bit, and let the cake cooled for about an hour in the oven (sudden drop in temperature could result in a cracked cake). Finish cooling the cake on a rack, before chilling in the fridge. 

13) Enjoy with whipped cream or fruits, or just on its own..