Pages

Showing posts with label baru.... Show all posts

Friday, August 26, 2022

Double chocolate cookie !


My sister requested for a video to compete my daughter in a kids cooking competition; realizing it's been awhile since her last video, I comply. I was researching for easy recipe for her to make, but at the same time I need to consider in only using what that is already in the kitchen, as I definitely not in the mood to shop for more items. While browsing through the pantry, I notice a small tub of cocoa powder and a pack of chocolate chips. Double chocolate cookie! 

As I was measuring the ingredients, I realize that I have not told my daughter that she is the one that will need to make the cookie, not me. Knowing that she gets excited and hurriedly go and washes her hands (she now accustoms with the rule of clean hands when cooking) and bugs me when I will be done in preparing the ingredients and set up the camera. Eventually I shooed her and her sister to watch some cartoon while I complete the set up. 

The recipe that I choose was one of the top three recipe that pops out when I type double chocolate cookie. But this recipe was chosen as it does not demand for brown sugar, which I don't have at the moment.  

The recipe demands for 1 1/2 cup of sugar, but reading the comments below the recipe stating the amount of sugar resulted to a "too sweet" of a cookie, I decided to cut the sugar to only 1 cup. The recipe also instructed for 10 minutes baking time, but somehow the cookie feels too soft at 10 minutes, that I add another 10 minutes, but maybe I only need to add 5 minutes. Still, the cookies tasted great. I think it will be nice to pair thee cookies with either milk or tea. 

 So here I present you double chocolate cookie...


Ingredients:

1 cup of sugar

1 cup of butter

2 eggs

2 teaspoon vanilla extract

2 cup of flour

2/3 cup of cocoa powder

3/4 teaspoon of baking soda

1/4 teaspoon of salt

2 cup of  semi sweet chocolate chips

1/2 cup of  chopped walnuts (optional)


Methods:

- Preheat the oven to 175 C

- Mix the dry ingredients: Flour, cocoa powder, baking soda and salt

- Beat the butter and sugar

-Add the eggs and vanilla extract and continue beating

- Fold in the dry ingredients a little bit at a time. 

- Mix in the chocolate chips and the nuts

- Scoop the cookie dough onto a baking tray with distance about 2-3 inches in between a dollop of dough

- Bake for about 10-15 minutes.

-Let the cookie cools a bit before enjoying..

Friday, April 22, 2022

Membakar lasagna menggunakan air-fryer


Saya akan meletakkan kaedah memasak lasagna menggunakan air-fryer di sini


1) Cairkan lasagna. Potong lasagna kepada dua supaya boleh dimasukkan ke bekas yang lebih kecil.

2) Pindahkan lasagna ke bekas yang lebih sesuai.

3) Tuang suku cawan air untuk membantu lasagna masak.

4)Bakar pada setting meat atau pada suhu 180 C selama 20 minit.

5) Lasagna sudah masak jika sudah tiada lapisan keras.


Tuesday, April 5, 2022

Membakar lasagna menggunakan ketuhar elektrik

 Di sini saya akan meletakkan kaedah saya membakar lasagna.

Dengan ketuhar elektrik:

1) Jika lasagna beku, biarkan sebentar hingga lasagna cair, atau rendam lasagna di dalam air panas hingga cair.

2) Panaskan ketuhar ke suhu 180 C 

3) Tuang suku cawan air ke dalam lasagna. Dan masukkan lasagna ke dalam ketuhar. Guna setting api bawah beserta kipas. Bakar dalam 25 minit.

4) Tukar setting ketuhar ke api atas bawah dan bakar hingga keju perang keemasan (~ 6 minit).

5) Keluarkan dari ketuhar. Biarkan sejuk sedikit.

6) Nikmati..

Saturday, February 5, 2022

Double tomato focaccia


Being a member to a family that bakes sure do have an implication to my choices of hobby, and it seems my choice of shows to watch also influenced by this. One of the shows that I watch repeatedly is The Great British Bake Off, and watching it somehow seem like splashing the fire to bake with gasoline. It burns brighter and stronger...

Last week, I was watching TGBBO which the bakers were assigned to bake focaccia and I was suddenly hankering to make my own version of focaccia. So yesterday, I opened a few web page for me to refer for my version of focaccia. Even if I want to make my version of a focaccia, I still want it to passed as a focaccia. 

As I don't have any mixer to help in kneading the dough for me and I take such a long time to knead, I decided to start kneading without activating the yeast first. So with my method, even if I knead at my pace, the yeast will not over bloom by the time I'm ready to prove.

So here is my version of focaccia:

Ingredient: 

Dough:

wet ingredients:

1 1/2 cup water

1 tablespoon honey

1 table spoon of vegetable oil (preferably olive oil)

3 tablespoon tomato puree


dry ingredients:

3 3/4 cup of all purpose flour

1 1/2 teaspoon salt

1 pack of yeast.

1 tablespoon of garlic confit (smashed) or garlic powder. 

1 tablespoon thyme

1 tablespoon oregano


Topping:

1/3-1/2 cup of vegetable oil

3 cloves of garlic

1 tablespoon thyme

1 tablespoon oregano

1/8 cup  of cheddar (small cubes) -optional

1/8 cup of mozarella (small cubes) -optional

1/4 cup of pepperoni (cut small) -optional


Method:

Put all the dry ingredient in a big bowl, remember to not put salt and yeast together as salt could inhibit the yeast.

Make a well in the center of the flour mound and pour the wet ingredient in.

Mix with your hand only until the ingredient is incorporated together. cover with a damp towel and let the dough rest for 15 minutes

Fold the dough by holding one side and fold it to the top, the hold the part next to it and fold it to the top of it self. Repeat this until you have made a full turn to the dough. Let it rest for another 15 minutes. Repeat this for 3-4 times.

Sealed the dough and let it rise for about 1 hour in room temperature or you can put it in the fridge and let it prove overnight.

While you are doing the fold and prove, combine the oil, garlic and herb in a pot. Put it on the lowest heat setting and let it infuse for 5 minutes max. Let it cool down before using it.

Prepare the baking pan; pour 1 tablespoon of the infused oil in the baking pan and smothered the inside of the pan. If you don't smothered the oil properly inside the pan, your focaccia will be difficult to remove from the pan later.

Transfer the dough into the pan and try to pull the dough to reach the edge of the pan. If the dough seems to be resisting the pull, let it rest for 10 minutes before trying again.

Let the dough prove for at least 45 minutes while you prepare the topping. Preheat the oven to 180.

If you are not planning on any physical topping but go to the traditional only infused oil; have a bowl of water beside you while you do this. Wet your fingers and make dimples by poking the dough straight until you can feel the pan. Make multiples dimples with the notions that those dimples will be a well to trap the oil and be a place for the taste to infuse into the bread. 

If you are using cubes topping, you can always put the cube on top of the dough and push the cube down until you meet resistant (the bottom of the pan). Do this until you get dimples throughout the focaccia. 

Pour the infused oil on top the dough, don't forget to sieve the oil from the ingredient that was use to infuse the oil. Sprinkle a pinch of salt on the dough.

Bake the focaccia for about 20 minutes, but you are wise to peek at 15 minutes mark. 

Remove the focaccia from the pan to a rack to cool it down. You don't want sweats on the underside of  the focaccia. 

You may prepare dip if you wants to, but I do enjoy the focaccia as it is. 

Thursday, October 14, 2021

Equine...Pony, unicorn, and pegasus


        Once when the first MCO was issued, and I had all the time in the world at my mother's house. I was struck by a sudden mood for arts and craft. By chance; one of my best friend was waiting for the arrival of her second child, I decided to make and give her a toy for the baby. I was browsing the internet when I saw a picture of a pony plushie. It looked so cute, but doable, that I decided to study the pictures and draw a pattern from the pictures of the plushies. From the pattern, I sew for her a pink pony. 

       Upon receiving the plushie, she urge me to post about how to make the pony plushie. At first I decided not to make another of the pony without any valid reason, even when my daughters were begging as to me they have too many toys...

      Cut to a month ago. My younger daughter has a unicorn bolster given by her grandaunt, and the bolster took a beating when both of the girls wants the unicorn. Not long after the tug of war, my eldest comes to me and requested for another unicorn, this time its for her. 

    As the distance between my first attempt to the pony was over a year ago, my mood for creativity has reignited, and I decided to make her a unicorn rather than dismissing her request or buying a unicorn plushie from the internet. And remembering my friend's request to make a tutorial on how to make this, I'm posting how I make the plushie. Mind you I use trial and error methods...


Here are the patterns:


Materials:
1) cloths 
2) materials for the mane and tail. (eg: yarn, fleece)
3) scissors
4) thread
5) stuffing
6) buttons for eyes


Methods:

As always, I will use old shirt or clothes as my materials for my arts and craft. I used my sister's old cardigan. 


Ok, I'm going to be honest, the process of attaching the pieces are a bit daunting. 

1) I start by attaching the head pieces, without the back of the head. 

2) Attach the body piece to the head.


3) Prepare the back head piece. Add the mane and the tail. Attach together the buttock piece.


4) Attach the ears to the head


5) Add the front mane behind the ears


6) Attach the back-of-head + buttock piece to the head by the ears.


7) Attach the tummy piece, but only to the chest and to the buttock. Leave the actual tummy stich free. Turn it inside out. 


8) Sew the inner leg.


9) Start sewing the tummy, Leave one side unattached . 

10)Don't forget to add the eyes.


11) Stuff..sew shut. Attach the sole of feet.


12) This become a horse, add a horn and it becomes a unicorn. add a pair of wings, you get a pegasus..


Tuesday, August 31, 2021

a Nasi Arab recipe

nak kata pandai sangat masak, x delah juga, tapi selalu ada je mood nak try resepi baru. So, masa alang2 balik rumah mak and ramai orang kat rumah ( ipar duai semua ada), try-lah resepi yg jumpa kat page fb ni. Alhamdulillah, reaksi yang baik, tapi ramai yang kurang senang dengan biji2 ketumbar dan lad hitam yang bertaburan dalam nasi. 
Pada cubaan kedua, saya masukkan ketumbar, jintan dan lada hitam ke dalam uncang kain. Hasilnya sangat memuaskan. Suami siap puji nasi ini lebih sedap dari kebanyakan nasi arab yang dia rasa...


akhirnya buat sekali lagi, baru sempat ambil gambar


Bahan:

Ayam

Bahan:
1/2 ekor ayam (dipotong dua)
1 kiub ayam
1/2 sudu besar ketumbar
1/2 sudu besar jintan
1/2 sudu lada hitam
1 biji tomato (potong empat)
1 batang cili hijau (potong empat)
1 sudu besar garam
3 sudu besar madu
3 sudu besar serbuk kunyit

Kaedah:
Rebus semua bahan dengan air paras cukup2 menutup ayam selama 30 minit.
Perap ayam dengan madu dan kunyit


Nasi

Bahan:
Minyak sapi/butter/minyak masak secukup untuk menumis
2 1/2 cawan beras basmathi yg telah direndam selama +- 30 min (5 min jika menggunakan beras biasa)
1/2 sudu besar ketumbar
1/2 sudu besar jintan
1/2 sudu besar lada hitam
Garam secukup rasa
1 sudu madu

Kaedah:
Buat bunjut dari ketumbar + jintan + lada hitam
Tumis bunjut hingga naik bau
Tumis beras +- 1 minit
Masukkan garam
Alihkan ke periuk elektrik
Letakkan ayam atas beras
Tuang madu atas ayam
Masukkan air rebusan mengikut ukuran biasa
Tabur daun ketumbar di atas ayam sebelum mula masak.


Salatah (salsa)

Bahan:
Timun - buang biji tengah dan potong dadu
Tomato - buang biji dan potong dadu
Bawang besar - potong dadu
Garam dan perahan lemon/limau

Kaedah:
Gaulkan timun + tomato + bawang
Tambahkan garam dan perahan limau secukup rasa.


Sambal

Bahan:
3 batang cili merah
3 batang cili padi merah
1 biji tomato
Beberapa tangkai daun ketumbar
Garam/gula
Perahan limau

Kaedah:
Kisar cili + tomato + daun ketumbar
Tambah garam + gula + perahan limau secukup rasa


Sup adalah citarasa orang melayu. Resepi sebenar tak ada sup. Anda boleh gunakan kiub pati ayam untuk membuat sup..atau kalau rajin boleh saja buat sup from scratch. 


Sunday, August 8, 2021

Naan - plain.. cheese.. garlic


   For a while now I am back in Shah Alam in the plan to help my post-natal sister. A few times in every week, she will request her husband to search for her naan. And as luck have it, her favorite restaurant stop producing naan due to the MCO. So her husband need to be creative in searching other restaurant that still serve the bread. So one morning when the young mother has been complaining that she is hungry and there is no breakfast prepared and there seems nothing is available to prepare, I decided to search for a simple naan recipe. I decided to follow the recipe from this webpage. And it yielded somewhat unexpectedly good naan.

Here is the recipe:


Ingredients:

3 cups of APF

1 tbsp sugar

1 tbsp yeast

1 tsp salt

1 tsp baking powder

1 1/4 cups of water

3 tbsp oil 


Method:

I used wet-mix-to-dry method. In one bowl I put together the dry ingredients, ensuring that yeast didn't touch with salt. In another container, I put together the wet ingredients. I decided to use cold water so the yeast has more time to rise as I usually took a long time to knead the bread. But this method only applicable if you are sure 100% that your yeast is alive. 

I used a mixing machine, as my hand was somewhat injured, but you could always use your strong pair of hands. Knead until the dough tend to stick upon it-self rather than to your hands. Cover and let to rest for about 30 minutes or until double in size.

Punch the dough, knead for a little bit more to ensure trough distribution. Divide the dough to six small ball. 

Flatten the ball, fill in with cheese (if you want to make a cheese naan) or with grated garlic (if you want to make a garlic naan), close into a new ball and flatten the ball again and cook on a non-stick pan and covered on the smallest heat. If you want a plain naan, you could always skip the filling step. In about 4-5 minutes, flip the naan to cook the other surface. Cook until the surface of the naan have golden spots and a little charred.   

Enjoy with curry, or mint sauce, or tandoori chicken or even on its own. 

Tuesday, March 9, 2021

Tomato bread


It's been awhile since I last made my sundried tomato bread. Honestly I so love that bread.. but the act of drying drying the tomato (I can't seem to find any sundried tomato sold anywhere) was so time and electric consuming.  So, I searched for another tomato bread but using tomato puree. I think it comes out quiet nicely. My daughter certainly think so..

ingredients:

3 1/2  cups apf

1 1/2 tbsp sugar

1 package active yeast

1/2 tsp salt

1/4 cup shredded cheddar

1/4 tsp dried oregano

1/4 tsp garlic powder

 1/4 tsp dried thyme

1/3 cup tomato puree

1 cup water

1 tbsp olive oil


Methods:

1) In a saucepan; heat tomato puree, water and oil. Set aside.

2) In a mixing bowl, combine the flour, sugar, salt, yeast, cheddar and herbs. Ensure when putting in the ingredient; do not put yeast and salt next to each other as salt could kill the yeast. Using a fork or whisk, mix the dry ingredient. 

3) Make a well and pour the wet ingredient in the well. Mix if you are using a mixer, or knead until smooth and elastic. 

4) Leave in a oiled bowl and cover. Let to prove until double the size ( for about 50 min)

5) Knead for about 5 min, shape the dough, put in the bread pan and let it prove for another 40-50 min 

6) Bake for about 30 minutes.


Thursday, February 18, 2021

No bake peach cheesecake


Since my daughter starting to star my videos, she has been hankering me for us to make a cheesecake. I kept on delaying as cream cheese is not an easy find, and even if you found it, the price can hurt your wallet. But as her grandfather's birthday nearing, I comply.

Ingredient:

Crust:

7-10 piece of digestive or marie biscuit

2 tablespoons of sugar

70g butter


Cake:

500g cream cheese

¾ cup of fine sugar

1 small box of cream (about 200 ml)

5 peach halves (pulverised)

1 teaspoon of vanilla

Orange food coloring (optional)

1 small pack of agar-agar (8-10g)

1 cup of water


Decoration:

Jelly or konyaku (prepare as instructed on packaging)

Peaches halves (cut to preference)


Methods:

Prepare the crust:

Crush the biscuit to preference. I prefer the biscuit some big pieces, some prefer it finer.

Add the melted butter and sugar.

Mix thoroughly

Pour into prepared springfoam pan that have been layered with cling film

Packed the biscuit using the base of a clean cup (or anything else that flat bottomed)

Put in fridge to solidify.


Prepare the agar-agar:

Pour the agar-agar powder in a saucepan.

Add in water and let it bloom for about 5 minutes

Melt on a small flame just before adding to the cheese base


Cake:

In a mixing bowl, put in the cream cheese and sugar. Beat until somewhat fluffy

Add in cream, crushed peach, and vanilla. Continue beating until fully incorporated

Add the hot agar-agar slowly while beating.

Pour the cheese base into the prepared cake pan

Put into the fridge to cool for at least 4 hours


Decorating:

Cut the peach halves to your liking and arrange it on the cake as your preference.

Pour prepared jelly or konyaku to solidify the arrangements.

Chill to set.


Tuesday, February 2, 2021

Chocolate cake - minus the egg


Since the start of the 1st MCO,  I've been staying at my mother's house which accidentally act as her bakery. Seeing her grandmother bakes everyday makes my daughter also wants to join in the fun. As luck have it, we are stuck at Kota Puteri at the present MCO. With not much she can do, she is begging me to allow her to bake (of course I did all the baking, she only do the pouring the ingredients into the mixing bowl). And around the same time my sister has been requesting me to edit a video of my daughter making fruit tarts for her work, that inspired me to record and edit my own video.  Being far from any known bakery, I was a little heavy hearted to let her use all of my butter stock for her baking, so I searched for recipe that uses oil rather than butter. This is the recipe I've decide to use and I do not regret one bit..

Ingredients:

2 cups sugar

3 cups all purpose flour

2 teaspoon baking soda

1/2 teaspoon salt

1/2 cup cocoa powder

2 cups water

1 teaspoon vanilla essence

1 cup vegetable oil

2 tablespoon vinegar. 


Methods:

Preheat your oven to 175 C and prepare your baking pan.

Mix all your dry items in a  bowl

Mix your wet ingredients in another bowl

Mix both of the wet and the dry ingredient until fully incorporated. 

Bake for about 40 minutes or until the toothpick inserted at the center comes out clean. 

Friday, October 30, 2020

Creamy tuna pie


Upon eating my chicken mushroom pie, my tuna avid father requested for tuna pie...

So I started to again search for some recipe for tuna pie. I was also actually somewhat ready to make new pastry crust (I used my previous crust for the chicken pie). I finally decided to use this recipe as my referral to make my pie. 


Ingredients:

2 tbs butter

2 tbs cooking oil

3 cloves of garlic, chopped

1 small onion, chopped

2 tbs all purpose flour

3 cups of milk

1/2 cup corn, drained

4 piece cheese

2 can tuna or 1 can tuna & 1 can sardine, drain, rinse and flaked.

salt pepper to taste

puff pastries, thawed


Methods:

Preheat the oven to 175C.

Melt the butter with the oil in a pan. Saute the onion and garlic until fragrance. 

Add flour and stir until cooked. About 2 minutes.

Turn off heat and whisk the milk little by little until creamy. 

Add the tuna, corn and cheese. Mix carefully.

Spread the tuna pastry to a suitable size. you can make a big pie if you want, but for me, a hand-held pie is more manageable. 

Give the pie an egg wash, you may sprinkle some black sesame or some oregano flakes if you want and bake the pie for about 10 minutes or until golden. 

Tuesday, October 27, 2020

chicken and mushroom pie

CHICKEN AND MUSHROOM PIE


My mother requested for me to find a decent chicken and mushroom pie as she wants me to provide stocks for her bakery. I searched and try to make my own recipe based on the 5-6 recipe that I found. This is my recipe; of course you can adjust and make your own. 

Ingredient

pie crust

3 piece of boneless chicken breast (small cube)
500g button mushroom (sliced)
1 onion (sliced)
2-3 cups of chicken stock or 1 cube of chicken stock
3 tbs oil
2 tbs flour
1/2 cup cream
1 tbs thyme
a pinch of salt; or to taste
1/2 tbs black pepper or garlic pepper
water ( as needed)

gravy:
100 g butter
1/2 cup flour
1-2 cup of chicken stock or 1/2 cube of chicken stock
1/2 tbs thyme
salt and pepper to taste


Methods:

Heat the oil on a frying pan. Sear the cubed chicken. Remove from the pan and set aside.

Saute the onion until soft and slightly caramelized.

Add in the mushroom, saute until soft. Stir.

Add the thyme and black pepper. Stir.

Add the flour and let it cook for awhile. Stir.

Add water and chicken stock. Stir. 

Add salt.

Add cream and stir until smooth.

Prepare the pie crust, it is better to do a blind bake before putting in the filling. 

Cover, put on an egg wash and bake until golden. 

For the gravy; melt the butter in a pan, add flour, whisk until fully incorporated. Add thyme and black pepper. Add chicken stock. Add cream while whisking. Add salt to taste. 


Saturday, October 3, 2020

Peanut butter cake


Upon a request, I googled for recipes of nuts cake. I read about walnut cake and multinut cake and fruit cakes too. Suddenly I was inspired to search about peanut cake, and lo behold google gave me recipes for peanut butter cake. I picked one that seems easy enough and picked an occasion to test the recipe out. The recipe request upon peanut butter frosting, but as  I buy just enough peanut butter for the cake, I need to improvise for the frosting. Using the peanut butter - grape jelly combo and chocolate for frosting, I serve the cake square to my family first. My children loves the cake with the chocolate frosting better, but I've found the peanut butter - jelly frosting suits my taste better. 

Here are the recipe:

Ingredients:

CAKE
2 cup Flour
2 cup Sugar
1 tsp Baking Soda
1/2 cup Milk
2 Eggs
1 tsp Vanilla
1 cup Water
1/2 cup Butter
3/4 cup Peanut Butter

FROSTING
1/2 cup softened Butter
1 cup Peanut Butter (or chocolate spread or peanut butter-jelly combo)
3 tbsp Milk
2 cup Powdered Sugar


Methods:

Cake

Preheat oven to 175 C.
Grease a 9×13 baking dish with butter. Dust with flour to prevent sticking.
Whisk together flour, sugar, and baking soda in a large bowl.
Add milk, eggs, and vanilla to bowl.
Beat mixture at low speed until blended.
Add water, butter, and peanut butter to a saucepan.
Heat over medium heat stirring frequently until blended (about 5 minutes).
Add peanut butter mixture into flour mixture.
Stir until batter is well mixed and pour into prepared dish.
Bake about 30 minutes or until a toothpick inserted in the center of the cake comes out clean.
Allow to cool.

Frosting 

Cream together the butter and peanut butter (or chocolate spread for my case).
Slowly add in the sugar, if it gets too thick then add a little milk to thin.
Continue until all of the sugar is in and the frosting is blended to the right consistency.
Spread frosting over cooled cake.


Monday, September 28, 2020

Serunding ayam


KONON...konon nak diet, so nak makan oat dengan serunding laa... tengok2 stok serunding dah nak habis. Cepat2 google resepi kat internet macam mana nak buat serunding ayam. Resepi yang nampak paling do-able jumpa kat page ni.. tapi of course saya ada edit sikit, nak makin mudahkan kerja sendiri dan ikut cita rasa saya... 😅


Bahan2:

-1 kilo (lebih kurang) ayam -rebus dan siat2 isinya

- santan -1 1/2 kotak

- 3 sudu besar jintan (kisar, saya x suka kasar, jadi saya kisar sehalus mungkin)

-3 sudu besar ketumbar (kisar, saya x suka kasar, jadi saya kisar sehalus mungkin)

- 5 biji bawang besar

- 1 labu bawang putih

- 5 sudu cili kisar

- 1 ruas halia lebih kurang besar ibu jari

- 3 sudu besar kerisik

- 1 keping asam keping (+- 2cmx2cm)

- garam gula secukup rasa


Kaedah:

- kisar bawang besar, bawang putih, halia, cili giling.

- tumis rencah bawang dan ketumbar jintan dalam kuali besar dengan minyak yang mencukupi. 

- masukkan asam keping dan santan. tumis hingga pecah minyak.

- keluarkan asam keping dan masukkan garam gula dan kerisik. 

- masukkan ayam dan kacau dengan api perlahan hingga kering (boleh lebih 3 jam..)

- nikmati


Saturday, May 23, 2020

No bake cheesecake using agar


A few weeks ago I try to make a mango no bake cheesecake using gelatin ( as instructed by the recipe), and dear me, it turned out to be a flop. The gelatin doesn't hold the cake, it blubbered out from the pan.  I tried to eat most of it, but cheesecake is not something you can enjoy too much of- the cream, the cheese. You'll go tired of it in no time. Not to mention as I was preparing the gelatin for the cake, the smell of it when exiting the microwave oven was  such a kill-off.
Being me, I wish to achieve some sort of a- yes! moment, so yesterday I tried the recipe using agar (a jellylike substance, obtained from red algae- wikipedia). As at the time I don't know there people who has already use this, I trialed adjusting the recipe I got from here and here.
While writing this I found out that there are actually those who have managed to achieve making cheesecake using agar. You can look the recipe here. Well, back to my adventure...


Ingredients:

Crust:
A- 1/2 pack of digestive biscuit
B- 1/4 cup of cornflake
C- 1 tablespoon of brown sugar
D- 65g of butter

Cheesecake filling:
A- 1/3 pack of agar (+-9g)
B- 1/4 cup of water
C- 250g cream cheese (room temperature)
D- 3/4 cup powdered sugar (shifted)
E- 1 teaspoon vanilla extract
F- 1 tablespoon fresh lemon juice (optional)
G- Zest of half a lemon (optional)
H- 1 cup of cream

I- A jar of blackberry/strawberry/raspberry jelly or jam (optional)

Methods:
1- Crush the biscuit and cornflake.
2- Melt the butter.
3- Mix thoroughly the crushed biscuit/cornflake, butter and sugar.
4- Press the mixture in a springform pan about 7x7 inch and put in the fridge for at least an hour to firm.
 5- Soak the agar into a bowl of water for about 10 minutes.
6-  Beat the cream cheese and sugar until fluffy.
7- Add the flavouring: Vanilla and lemon, and continue beating
8- Strain the water out of the agar. Put the agar into the 1/4 cup of water and heat in low with a microwave oven. Stir for every 5 minutes until all is smooth and melted.
9- Add the cream into the cheese filling and continue beating. Don't forget to scrape the sides of the bowl.
10- Slowly drizzle the agar into the cheese filling while the beating the fillings.
11- Quickly pour the filling into the springform pan and smooth it.
12- Melt the jelly in the microwave over low and sieve if there is seeds in them.
13- Pour on top the cheesecake and let everything set in the fridge for at least 4 hours.

These are the ingredients I think should be use instead; (I think I've used a little bit more agar than I should- I used maybe 12g, but when eating it, the texture seems spot on)

Here is the picture of my failed no bake mango cheesecake:


How it tells you should never judge from looks..

Sunday, May 17, 2020

chicken dim sum


When I made chicken murtabak using popia sheet (I got this idea from Facebook), I notice that wet popia sheet has the almost the texture of dim sum's wrapper after steaming. It inspire me to search for recipe for dim sum from several web page. Eventually this is the recipe that I settle with

Ingredients:
A- 800g of mince chicken
B- 1/4 cup of corn flour
C- 1/3 carrot (small dice)
D- 1/8 cabbage (small dice)
E- 1/3 onion (small dice)
F- 2 stalk of scallion (cut small)
G- 2 eggs
H- salt and sugar to taste
I- popia sheet


Methods:
1- cut the popia sheet so you will have equal 4 small squares wrapper sheet for every 1wrapper sheet
2- put all the other ingredient in a bowl and mix well.
3- use 2 layer of the wrapper (1 layer is a bit too thin) and put a small dollop of the mixture in the middle of the wrapper
4- use flour water to act as glue. you can use which ever method to shape the dim sum.
5- steam the dim sum until the wrapper seems translucent.
6- enjoy warm..

Friday, November 8, 2019

Mee udang, basic


Mee Udang

baru-baru ini adik saya request saya memasak mee udang, jadi saya fikir saya perlu buat carian dalam internet kerana saya tahu udang tidak patut dimasak lama.


Bahan-bahan

udang, 2-3 ekor seorang, bersihkan (kulit dan kepala udang digunakan untuk air rebusan)
minyak masak
sebiji bawang besar, dicincang
Segenggam udang kering; ditumbuk
cili boh, 3-6 sudu, bergantung kepada cita rasa
sos tiram
sos cili
sayur mengikut cita rasa; sawi, kobis, lobak merah
Kentang atau keledak rebus dilenyek untuk memekatkan kuah (pilihan)
mee kuning, dibasuh bersih.
garam gula mengikut cita rasa

Kaedah

1) Rebus udang sehingga udang bertukar merah, tapis. Air rebusan disimpan untuk mee. Buat air rebusan menggunakan kulit dan kepala udang.
2) Panaskan minyak dalam kuali dan tumis bawang.
3) Tambahkan cili boh dan tumis hingga naik minyak.
4) Tambahkan sos tiram dan sos cili dalam 2-3 sudu setiap satu dan masak.
5) Masukkan sayur.
6) Tuang masuk air rebusan udang
7) Masukkan kentang atau keledek lenyek.
8) Tambahkan garam dan gula mengikut cita rasa.
9) Masukkan mee dan masak sebentar hingga rasa serasi.


Peanut butter cookie


Peanut butter cookies..
I was looking for a cookie recipe as i want to reduce my buying and be able to control what goes in my children's tummy, and it is a fun recipe to bake with children.. hehe

Ingredient
A - 1.5 cups all purpose flour
B - 1 tsp baking soda
C - 1/2 tsp baking powder
D - 3/4 tsp salt
E - 1/2 cup unsalted butter (soften)
F - 1/2 cup granulated sugar
G - 1/2 cup brown sugar
H - 1 large egg
I  - 1 tsp vanilla essence
J  - 1 cup peanut butter

Method
1 - Pre-heat oven to about 170 C
2 - In a bowl, mix together flour, baking soda, baking powder and salt. Set aside.
3 - Beat and cream butter, granulated sugar and brown sugar
4 - Add egg and vanilla essence
5 - Add the peanut butter
6 - Add the dry ingredient gradually.
7 - Fold in chocolate chip or sprinkle if you want...
8 - Scoop small dollops onto tray with space to spread.
9 - Bake around 15 minutes, until the bottom and edge is slightly brown but the center is still slightly soft.


Friday, October 26, 2018

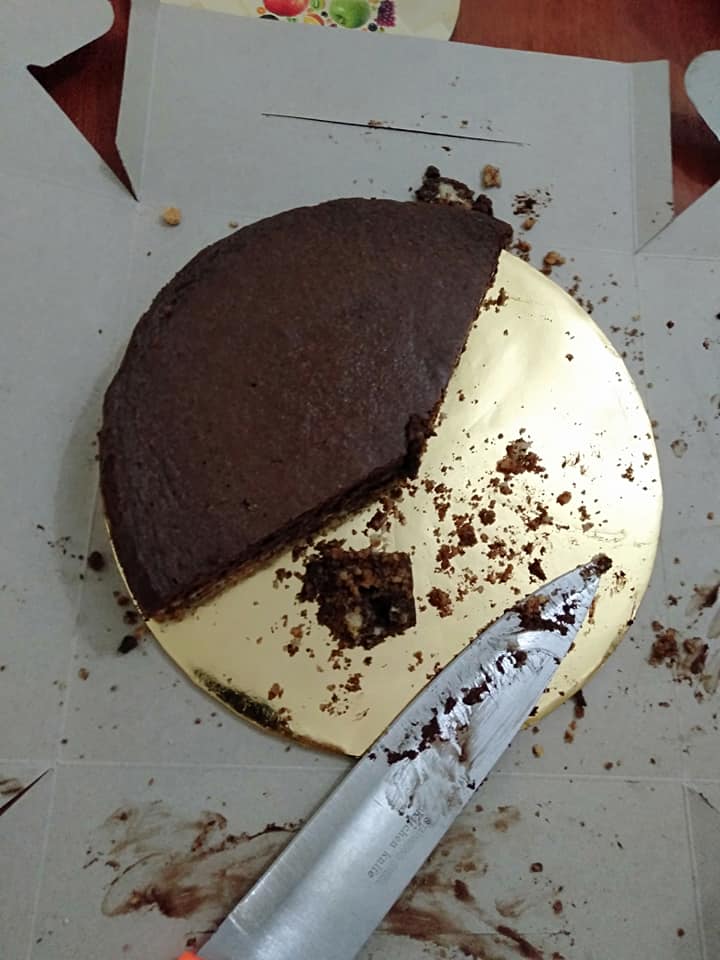
chocolate cheesecake - baked


  The other day, one of my close friend finishes her studies, and return home after a long absence. As it is unusual for me to cook for my friends, I asked her what she would like me to make for her. Not known for her sweet tooth, I was surprised when she requested a cake, and a chocolate cheesecake to boot! I was determined not to be dampen, as it was my self who asked her to choose. So I googled recipes for no bake chocolate cheesecake, and the recipe from here is the easiest for me to follow.  You can follow this recipe, but due to some mistakes,I decided to add eggs to help firmed the cake, and thus, I have to bake it. 
     The following are the recipe for the cake that I made

Ingredient:


  • 150g (5 oz) Marie biscuits
  • 45g (1 1/2 oz) butter (melted)
  • 110g (4 oz) caster sugar, divided
  • 120ml cream
  • 150g (5 oz) dark chocolate, melted and cooled
  • 2 tablespoons cocoa powder mixed with a little hot water
  • a splash of vanilla essence
  • 200g cream cheese (room temperature)
  • 2 large eggs

Methods:

1) Beat the biscuits in a plastic bag until they become crumbs. you may leaves some crumbs a bit bigger if you like to

2) Pre-heat the oven to 180C

3) Add the butter and a tablespoon-full of sugar to the biscuit crumbs. You may add some cocoa powder to the mixture to give some colour and taste; I did.

4) Prepare a spring form cake tin; line the tin with baking paper, use butter to help it stick to the tin

5) Pour the biscuit mix into the cake tin. Compress and level the mix using the bottom of a clean glass. put in the refrigerator to set. 

6) Beat the cream cheese with sugar until fluffy

8) Add the chocolate and vanilla essence

9) Combine the cream and diluted cocoa powder, and add to the cream cheese mixture. 

10) Add the eggs one by one.

11) Pour into the cake tin, reduce the oven's temperature to 175C. Bake the cake using a water bath method (google it if this is the first time you are confronted with the term)

12) Bake for 45 minutes; or until the toothpick comes out clean after poked into 1 inch from the edge. Turn off the temperature, open the oven door for a bit, and let the cake cooled for about an hour in the oven (sudden drop in temperature could result in a cracked cake). Finish cooling the cake on a rack, before chilling in the fridge. 

13) Enjoy with whipped cream or fruits, or just on its own..


Saturday, August 20, 2016

New Love


Life has brought new love into my life. and I do love her with a vengeance. Though she can always spark an anger to my mood, but she is easy to love.. I don't know one can love someone as hard. And her cuteness is really another asset to people falling in love with her (I'm not the only one).
I thank Allah each day for giving her to us. She is such a blessing to us.
I dedicate this post to you Hana Sakinah. I do love you. May I can always be a good example to you and lead you to road to Jannah. In sya Allah.