Pages

Saturday, September 28, 2019

sup daging


Bersempena dengan raya qurban yang lepas, saya mencari cara2 untuk meng"upgrade"kan resepi sup tulang. Sup tulang kebiasaannya akan meninggalkan perasaan sedikit muak apabila sudah sejuk, lebih2 lagi jika sup tersebut berminyak dan berlemak. Pada masa yang sama saya tidak mahu menggunakan bahan yang saya perlu beli dan akan gunakan hanya sekali (untuk resepi tersebut sahaja) dan kaedah yang terlalu sukar.
Di sini adalah beberapa kaedah mudah yang saya jumpa untuk menaikkan sup tulang atau sup daging anda.

bahan:
1- 2-3 biji kentang dan lobak merah (rebus hingga lembut dan kisarkan)
2- 500g tulang atau daging. (rebus hingga empuk)
3- 1-2 sudu besar serbuk sup
4- 1-2 biji buah keras ditumbuk halus (terpulang ikut cita rasa)
5- 4-5 biji bawang merah dihiris
6- 1-1.5 inci halia dihiris jejari halus
7-  2-3 biji bawang putih dihiris
8- 2 biji bawang besar dipotong empat
9- bunga lawang dan kayu manis
10- 3 sudu besar cuka atau perahan limau
11- garamdan gula secukup rasa.

kaedah:
a- Tumis bawang merah, halia, bawang putih, serbuk sup, kayu manis dan bunga lawang. Tumis hingga wangi.
b- Masukkan kentang dan lobak kisar. Tumis hingga naik minyak.
c- Masukkan rebusan tulang dan cuka.
d- Masukkan buah keras dan bawang besar.
e- Masak hingga serasi.
f- Tambah garam gula mengikut cita rasa.


Sedap dinikmati dengan nasi atau roti, atau mungkin juga dihirup begitu sahaja...(;
Sedap sangat, lupa nak amik gambar...


Saturday, June 22, 2019

A Brownies recipe- finally

A brownies recipe finally? Well the first time I've tasted brownies was when I was 10 years old. I was like- why haven't I tasted this before? To say that this is chocolate cake would be... out of it's league? but it's chocolate. Until someone there pointed out to me, no- it's not a cake, it's brownies. Yeah, that it it's name- brownies.
When I've gotten older, and I've gotten myself into baking, I tried a lot of recipe of brownies, maybe not a lot, but quite a number of it. I even tried to trace down my friend that brought that my-first-brownies-that-I-tried, who changed school once we finished primary school, who parents got separated and the only lead I had was then an acquaintance with the new mother. I am still trying to get the recipe from her- don't be fooled by my writing that I've obtained the recipe, but, this recipe at least was well received by me and my family. I got the recipe from here; I haven't tweaked it, yet- ok maybe I sprinkled some flaked almonds on top before baking, and I could try to make it less sweet- but that is for another time.

A picture? Sorry, maybe next time. The brownies was abolished....

 Ingredient:

1 1/4 cups (249 grams) granulated sugar
5 tablespoons (71 grams) unsalted butter
2 large eggs plus 1 egg yolk, cold
1 teaspoon vanilla extract
3/4 cup (75 grams) unsweetened cocoa powder
1/3 cup vegetable oil
1/2 cup (63 grams) all-purpose flour
1/8 teaspoon baking soda
1 tablespoon cornstarch
1/4 teaspoon salt
3/4 cup (128 grams) semisweet chocolate chips
Methods:

1- Preheat the oven to 180 C. Line a 8 by 8-inch pan with either butter and cocoa powder or butter and baking paper.
2-In a microwave safe bowl, add the butter and sugar. Microwave for about 1 minute, or until the butter is melted. (I've yet to try melting the butter in a saucepan, on the stove). Whisk in the eggs, egg yolk, and vanilla. Stir in the oil and cocoa powder.
3- With a rubber spatula, stir in the flour, baking soda, cornstarch, and salt until combined. Stir in the chocolate chips.
4- Spread the brownie batter evenly into the prepared pan. Here is where I sprinkle some almond flakes on top. Place in the oven and bake for 30 minutes, or until the brownies are set and a cake tested inserted into the center has moist crumbs attached. Do not overcook. Let cool completely before cutting and serving.

It was said that the brownies can be stored in an airtight container at room temperature for up to 3 days, but we have yet to go pass 2 days before it was cleaned out.

Saturday, May 25, 2019

muruku..


The other day, my mother in law gave us some muruku that was enjoyed especially by my daughter. I was very shocked to learn that my mother in law made the muruku her-self. It never occurs to me that you could make your own muruku.

This is my version of her muruku recipe:


Ingredients:

a- 1 pack (500g) of muruku flour
b- 3/4 pack (375g) of glutinous rice flour
c- 2 teaspoon of white sesame seed
d- 1 teaspoon of caraway seed (rempah jemuju)
e- 1 teaspoon salt (or adjust to taste)
f- curry leaves to taste (blended)
g- 2 eggs
h- chili paste (to taste)
i- 600ml boxed coconut milk
j- 2 1/2 cup of water
k- oil for frying

Method:

1- combine all dry ingredient in a big bowl and mix thoroughly.
2- beat the eggs in a bowl, and add the chili paste and the coconut milk.
3- mix the dry and the wet ingredient
4- add the water by small batches so you will not over liquefy the mixture.
5- put the mixture into the muruku press, heat the oil in a frying pan
6- press the mixture in a round manner. Fry until crispy.

Tuesday, March 19, 2019

Sugar biscuits


On the occasion of making almost everything myself,  I decide to make my own sugar biscuits, especially when you can add to this recipe. I got the recipe from here. But this is my interpretation:


Ingredient:
375 g salted butter (or add a teaspoon of fine salt if you use unsalted butter)
90 g powdered sugar
1 teaspoon vanilla essence
400 g all purpose flour (you could add a teaspoon of baking soda if you wish)


Method:
  1. Preheat oven to 350F (180C). Line baking sheets with parchment paper.
  2. Place butter in a bowl and beat until creamy. Add powdered sugar and vanilla extract and continue mixing until the mixture becomes white and creamy.
  3. Using a spatula incorporate flour into the butter mixture until completely combined.
  4. Form small round dough of cookies on the prepared baking sheets. You may add chocolate chips, nut bits, M&M's, or basically anything here.
  5. Bake for 10-20 minutes or until the base begins to brown.
  6. Let the cookies cool completely on a cooling rack before serving.


sun dried tomato and cheese bread


Once upon a day, i suddenly remembered when once Gardenia produced tomato and olive bread, but then one day, they stopped producing them. I used to really liked them too...
So, in the memory of that bread I suddenly wanted to bake my own bread, especially since my mother has started the spark by opening her bakery and I watching The Great Bake Off; British and Australia.


So here are the recipe; I got the recipe from here, but I edited some:

Ingredient:

  • 500 g (16 oz) bread flour
  • 400 ml (10 fl oz) lukewarm water
  • 50 g (2 oz) freshly grated parmesan cheese
  • 25 g (1 oz) dry sun-dried tomatoes (or twice the amount if they come in oil)
  • 20 g black olives, pitted and sliced (optional)
  • 2 tbsp olive oil
  • 2 tsp sugar
  • 1 tsp salt
  • 1 tsp dried yeast


Method:

  1. Add the yeast and sugar to the water. Mix well and leave for 10 minutes to allow the yeast to activate.
  2. Put the flour, cheese and salt in a large bowl and mix well. Add the yeast/water, the olive oil and the sun-dried tomatoes (and olives). Mix well to a soft dough. 
  3. Knead the dough on a floured surface for 10 minutes until smooth and elastic.
  4. Place the dough in a lightly-oiled bowl. Cover and leave in a warm place until the dough doubles in size, in about 1 hour.
  5. Turn the dough out onto a floured surface, knock it back and knead for a further 5 minutes.
  6. Shape the dough into a large sausage or a round form. 
  7. Place the loaf on a lightly oiled baking tray, cover and leave in a warm place for about an hour for the dough to rise again.
  8. Cut 5 or 6 slashes in the top of the loaf with a sharp knife and dust lightly with flour.
  9. Bake at 190°C/375°F fan oven, 220°C/430°F conventional oven for about 25 minutes until the crust has turned a deep brown.
  10. Place on a wire rack to cool.

Info: for better coverage of taste, you could soak the tomatoes in hot water for about 15 minutes before cutting it. 

Friday, October 26, 2018

chocolate cheesecake - baked


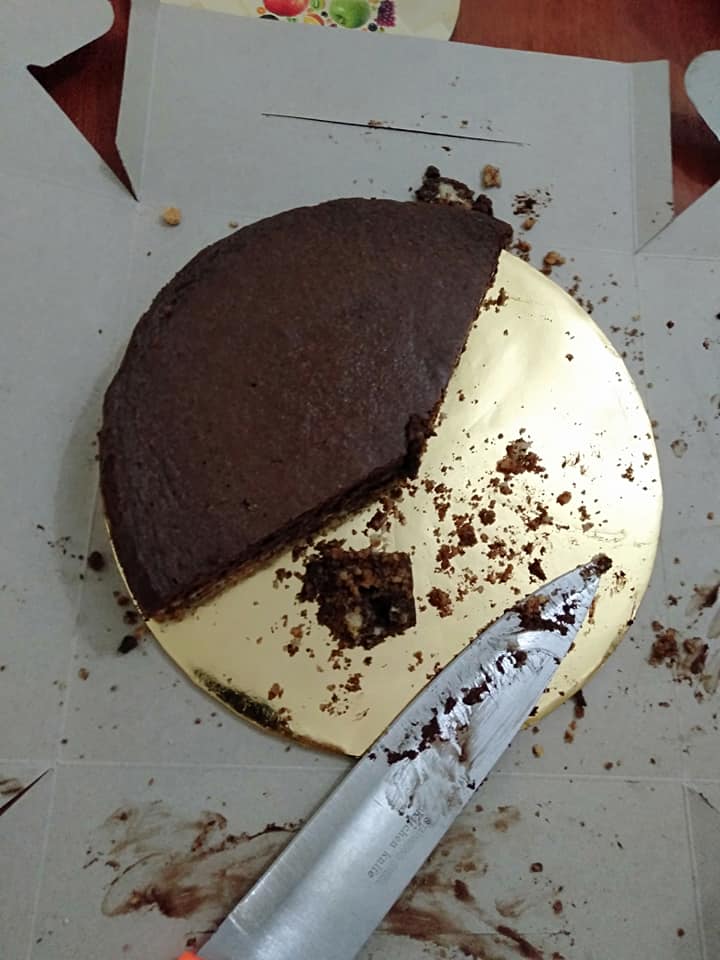
  The other day, one of my close friend finishes her studies, and return home after a long absence. As it is unusual for me to cook for my friends, I asked her what she would like me to make for her. Not known for her sweet tooth, I was surprised when she requested a cake, and a chocolate cheesecake to boot! I was determined not to be dampen, as it was my self who asked her to choose. So I googled recipes for no bake chocolate cheesecake, and the recipe from here is the easiest for me to follow.  You can follow this recipe, but due to some mistakes,I decided to add eggs to help firmed the cake, and thus, I have to bake it. 
     The following are the recipe for the cake that I made

Ingredient:


  • 150g (5 oz) Marie biscuits
  • 45g (1 1/2 oz) butter (melted)
  • 110g (4 oz) caster sugar, divided
  • 120ml cream
  • 150g (5 oz) dark chocolate, melted and cooled
  • 2 tablespoons cocoa powder mixed with a little hot water
  • a splash of vanilla essence
  • 200g cream cheese (room temperature)
  • 2 large eggs

Methods:

1) Beat the biscuits in a plastic bag until they become crumbs. you may leaves some crumbs a bit bigger if you like to

2) Pre-heat the oven to 180C

3) Add the butter and a tablespoon-full of sugar to the biscuit crumbs. You may add some cocoa powder to the mixture to give some colour and taste; I did.

4) Prepare a spring form cake tin; line the tin with baking paper, use butter to help it stick to the tin

5) Pour the biscuit mix into the cake tin. Compress and level the mix using the bottom of a clean glass. put in the refrigerator to set. 

6) Beat the cream cheese with sugar until fluffy

8) Add the chocolate and vanilla essence

9) Combine the cream and diluted cocoa powder, and add to the cream cheese mixture. 

10) Add the eggs one by one.

11) Pour into the cake tin, reduce the oven's temperature to 175C. Bake the cake using a water bath method (google it if this is the first time you are confronted with the term)

12) Bake for 45 minutes; or until the toothpick comes out clean after poked into 1 inch from the edge. Turn off the temperature, open the oven door for a bit, and let the cake cooled for about an hour in the oven (sudden drop in temperature could result in a cracked cake). Finish cooling the cake on a rack, before chilling in the fridge. 

13) Enjoy with whipped cream or fruits, or just on its own..


Tuesday, July 24, 2018

mexico bun / rotiboy's crust


I didn't have the recipe for the bread, but here is the recipe for the crust. the recipe that I have have just enough coffee for you to taste the coffee, but if you are a coffee addict, you can add anothe teaspoon, I supposed.

Ingredient:
dilute together:
1 tsp hot water
1 tsp vanilla extract
2 tsp instant coffee powder

mix together and sieve if possible:
120g all purpose flour
1/4 tsp baking powder
1/4 tsp salt

100g unsalted butter; room temperature
90g confectioner's sugar
2 large eggs


method:
1- beat the butter with the sugar until light and fluffy
2- add in the eggs, one at a time
3- mix in the coffee
4- fold in the flour mixture.
5- put into piping bag and pipe in a spiral onto risen buns that are ready to be baked
    *reminder to pipe just as needed, as too much topping would overflow and be cakey, which is not the objective of the topping*

this is my aunt sakinah's recipe.