Pages

Saturday, May 25, 2019

muruku..


The other day, my mother in law gave us some muruku that was enjoyed especially by my daughter. I was very shocked to learn that my mother in law made the muruku her-self. It never occurs to me that you could make your own muruku.

This is my version of her muruku recipe:


Ingredients:

a- 1 pack (500g) of muruku flour
b- 3/4 pack (375g) of glutinous rice flour
c- 2 teaspoon of white sesame seed
d- 1 teaspoon of caraway seed (rempah jemuju)
e- 1 teaspoon salt (or adjust to taste)
f- curry leaves to taste (blended)
g- 2 eggs
h- chili paste (to taste)
i- 600ml boxed coconut milk
j- 2 1/2 cup of water
k- oil for frying

Method:

1- combine all dry ingredient in a big bowl and mix thoroughly.
2- beat the eggs in a bowl, and add the chili paste and the coconut milk.
3- mix the dry and the wet ingredient
4- add the water by small batches so you will not over liquefy the mixture.
5- put the mixture into the muruku press, heat the oil in a frying pan
6- press the mixture in a round manner. Fry until crispy.

Tuesday, March 19, 2019

Sugar biscuits


On the occasion of making almost everything myself,  I decide to make my own sugar biscuits, especially when you can add to this recipe. I got the recipe from here. But this is my interpretation:


Ingredient:
375 g salted butter (or add a teaspoon of fine salt if you use unsalted butter)
90 g powdered sugar
1 teaspoon vanilla essence
400 g all purpose flour (you could add a teaspoon of baking soda if you wish)


Method:
  1. Preheat oven to 350F (180C). Line baking sheets with parchment paper.
  2. Place butter in a bowl and beat until creamy. Add powdered sugar and vanilla extract and continue mixing until the mixture becomes white and creamy.
  3. Using a spatula incorporate flour into the butter mixture until completely combined.
  4. Form small round dough of cookies on the prepared baking sheets. You may add chocolate chips, nut bits, M&M's, or basically anything here.
  5. Bake for 10-20 minutes or until the base begins to brown.
  6. Let the cookies cool completely on a cooling rack before serving.


sun dried tomato and cheese bread


Once upon a day, i suddenly remembered when once Gardenia produced tomato and olive bread, but then one day, they stopped producing them. I used to really liked them too...
So, in the memory of that bread I suddenly wanted to bake my own bread, especially since my mother has started the spark by opening her bakery and I watching The Great Bake Off; British and Australia.


So here are the recipe; I got the recipe from here, but I edited some:

Ingredient:

  • 500 g (16 oz) bread flour
  • 400 ml (10 fl oz) lukewarm water
  • 50 g (2 oz) freshly grated parmesan cheese
  • 25 g (1 oz) dry sun-dried tomatoes (or twice the amount if they come in oil)
  • 20 g black olives, pitted and sliced (optional)
  • 2 tbsp olive oil
  • 2 tsp sugar
  • 1 tsp salt
  • 1 tsp dried yeast


Method:

  1. Add the yeast and sugar to the water. Mix well and leave for 10 minutes to allow the yeast to activate.
  2. Put the flour, cheese and salt in a large bowl and mix well. Add the yeast/water, the olive oil and the sun-dried tomatoes (and olives). Mix well to a soft dough. 
  3. Knead the dough on a floured surface for 10 minutes until smooth and elastic.
  4. Place the dough in a lightly-oiled bowl. Cover and leave in a warm place until the dough doubles in size, in about 1 hour.
  5. Turn the dough out onto a floured surface, knock it back and knead for a further 5 minutes.
  6. Shape the dough into a large sausage or a round form. 
  7. Place the loaf on a lightly oiled baking tray, cover and leave in a warm place for about an hour for the dough to rise again.
  8. Cut 5 or 6 slashes in the top of the loaf with a sharp knife and dust lightly with flour.
  9. Bake at 190°C/375°F fan oven, 220°C/430°F conventional oven for about 25 minutes until the crust has turned a deep brown.
  10. Place on a wire rack to cool.

Info: for better coverage of taste, you could soak the tomatoes in hot water for about 15 minutes before cutting it. 

Friday, October 26, 2018

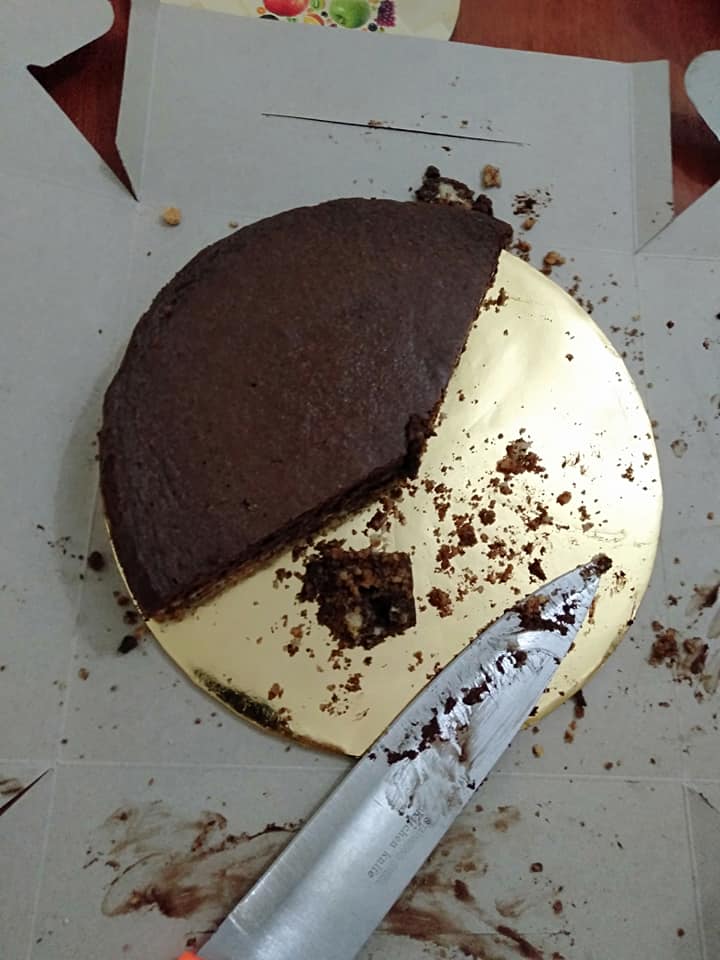
chocolate cheesecake - baked


  The other day, one of my close friend finishes her studies, and return home after a long absence. As it is unusual for me to cook for my friends, I asked her what she would like me to make for her. Not known for her sweet tooth, I was surprised when she requested a cake, and a chocolate cheesecake to boot! I was determined not to be dampen, as it was my self who asked her to choose. So I googled recipes for no bake chocolate cheesecake, and the recipe from here is the easiest for me to follow.  You can follow this recipe, but due to some mistakes,I decided to add eggs to help firmed the cake, and thus, I have to bake it. 
     The following are the recipe for the cake that I made

Ingredient:


  • 150g (5 oz) Marie biscuits
  • 45g (1 1/2 oz) butter (melted)
  • 110g (4 oz) caster sugar, divided
  • 120ml cream
  • 150g (5 oz) dark chocolate, melted and cooled
  • 2 tablespoons cocoa powder mixed with a little hot water
  • a splash of vanilla essence
  • 200g cream cheese (room temperature)
  • 2 large eggs

Methods:

1) Beat the biscuits in a plastic bag until they become crumbs. you may leaves some crumbs a bit bigger if you like to

2) Pre-heat the oven to 180C

3) Add the butter and a tablespoon-full of sugar to the biscuit crumbs. You may add some cocoa powder to the mixture to give some colour and taste; I did.

4) Prepare a spring form cake tin; line the tin with baking paper, use butter to help it stick to the tin

5) Pour the biscuit mix into the cake tin. Compress and level the mix using the bottom of a clean glass. put in the refrigerator to set. 

6) Beat the cream cheese with sugar until fluffy

8) Add the chocolate and vanilla essence

9) Combine the cream and diluted cocoa powder, and add to the cream cheese mixture. 

10) Add the eggs one by one.

11) Pour into the cake tin, reduce the oven's temperature to 175C. Bake the cake using a water bath method (google it if this is the first time you are confronted with the term)

12) Bake for 45 minutes; or until the toothpick comes out clean after poked into 1 inch from the edge. Turn off the temperature, open the oven door for a bit, and let the cake cooled for about an hour in the oven (sudden drop in temperature could result in a cracked cake). Finish cooling the cake on a rack, before chilling in the fridge. 

13) Enjoy with whipped cream or fruits, or just on its own..


Tuesday, July 24, 2018

mexico bun / rotiboy's crust


I didn't have the recipe for the bread, but here is the recipe for the crust. the recipe that I have have just enough coffee for you to taste the coffee, but if you are a coffee addict, you can add anothe teaspoon, I supposed.

Ingredient:
dilute together:
1 tsp hot water
1 tsp vanilla extract
2 tsp instant coffee powder

mix together and sieve if possible:
120g all purpose flour
1/4 tsp baking powder
1/4 tsp salt

100g unsalted butter; room temperature
90g confectioner's sugar
2 large eggs


method:
1- beat the butter with the sugar until light and fluffy
2- add in the eggs, one at a time
3- mix in the coffee
4- fold in the flour mixture.
5- put into piping bag and pipe in a spiral onto risen buns that are ready to be baked
    *reminder to pipe just as needed, as too much topping would overflow and be cakey, which is not the objective of the topping*

this is my aunt sakinah's recipe.


Chocolate tart


Ingredient:
Pie crust

8 ounce cooking chocolate, chopped
1 cup heavy cream
1 large egg
sugar, optional

chopped nuts (optional)

Methods

1) blind bake your shaped pie crust, leave to cool.
2) pour onto your chopped chocolate, the heated cream. stir until all melted. taste and add sugar if needed, let cool
3) bake the nuts for a few minutes until slightly golden. chopped the nuts if it haven't been chopped
4) add the nuts into the chocolate. let cool.
5) add the egg, mix throughly
6) pour the chocolate into the crust, careful not to overflow
7) bake the tart in a low heated oven until firm. a cracked tart indicate the tart has over baked.
8) enjoy!


Affie (Fluffy) suddenly came into the photoshooting area and sat

Saturday, December 30, 2017

Roti canai..


I'll be honest, i have been requesting my mother her roti canai recipe since forever, when I finally cannot wait anymore, I just refer to whoever's recipe from the internet..tough the methods still used my mother's roti canai making methods. 

I somewhat noticed long ago, it was somewhat a tradition, I supposed, for the newly-weds in my grandmother's village to fry roti canai the morning after the reception for the neighbors who helped in the preparation for the wedding. But since nowadays catering is the go-to for most people, I dont see that anymore.. so I'm somewhat miss the homey feeling of roti canai, the one we knead with our own hands (tough I have never knead roti canai before this)

Ingredients:
2 cups of all purpose flour
A pinch of salt
1 tablespoon of sugar
1 tablespoon of powdered milk (the recipe that I referred to used 1 tablespoon condensed milk)
1 tablespoon of butter (the recipe that I referred to used margerine, and some say to use ghee)

a small cup of water ( there are recipe that say to use ice-cold water, and there are recipe that say to used boiling hot water, to be fair, I use warm water)

extra butter
cooking oil

Methods:
1- in a big bowl, mix together all the dry ingredients and make a well in the center.
2- pour in the water, little by little and start mixing
3- add more water or more flour if you fell the dough is too dry or too sticky.
4- knead until smooth.
5- divide the dough into small balls, about the size of 2 chicken eggs combined, I usually get about          7- 8 balls per batch
6- put in a small dollop of butter in the middle of each ball and smoldered each ball with more butter.
7- put those bowl in a bowl and  submerge with oil.
8- let them rest for at least a few hours or a whole night before the next step
9- the nest step is to spread the ball, fold back in, let rest for a few minutes, before spreading it again.       you could use the mamak spreading style or even the pizzeria style if you can. I just used the on-         top-of-a-big-tray style
10- fry using the extra oil from the submerging of the dough
11- enjoy with dhall, or curry or even sambal.